How to Print on a T-Shirt: A Simple Guide for Beginners
T-shirt printing has become more than just a hobby. It’s a way to express creativity, build a brand, or even start a small business. Whether you’re designing shirts for your team, launching your clothing line, or making custom gifts, learning how to print on a t-shirt is a useful and rewarding skill.
In this guide, we’ll walk you through the basics of t-shirt printing, the most popular methods, and how to get started, all explained in simple, beginner-friendly language.
Step 1: Choose Your Design
The first step in printing a t-shirt is deciding what you want to print. It could be anything: your company logo, a catchy phrase, original artwork, or a custom design for a special event.
Tips for choosing a good design:
- Keep it clear and simple. Intricate details might not show well on fabric.
- Make sure the design fits the shirt’s size and purpose.
- Use high-resolution images to ensure sharpness when printed.
If you’re not confident with design software, you can use free tools like Canva or hire a professional designer. At PLC Print, we often help our clients turn their ideas into high-quality, print-ready artwork that looks fantastic on fabric.
Step 2: Select the Right T-Shirt
Not all t-shirts are created equal. The type of fabric you choose will affect how the print looks and how long it lasts.
Here’s what to look for:
- Cotton: Great for soft feel and excellent for most printing methods.
- Polyester: Ideal for sublimation printing.
- Blends: Offer a balance between comfort and durability.
Also, think about the fit, color, and style of the shirt. A dark shirt will require different printing techniques and ink types compared to a light one.
Step 3: Pick a Printing Method
There are several ways to print on t-shirts. Each has its pros, cons, and best use cases.
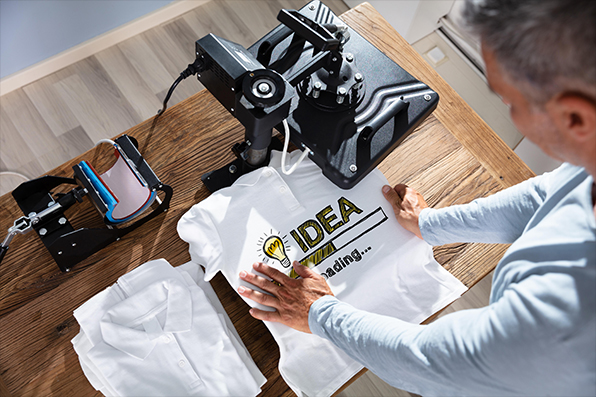
- Heat Transfer Printing
This method uses heat and pressure to transfer your design onto the fabric using special transfer paper. You can use a home iron or a heat press machine.
Best for: Beginners, small batches, DIY printing
Pros: Easy and affordable
Cons: May not last as long as other methods
- Screen Printing
In screen printing, ink is pushed through a mesh screen onto the t-shirt. Each color requires a separate screen.
Best for: Large orders with simple designs
Pros: High-quality and durable prints
Cons: Time-consuming setup, not ideal for complex multi-color designs
- Direct-to-Garment (DTG) Printing
DTG printers work like inkjet printers for clothing. They spray ink directly onto the fabric.
Best for: Detailed or photo-realistic designs
Pros: No setup required, high resolution
Cons: Works best on 100% cotton, can be costly for large batches
- Sublimation Printing
This method uses heat to turn dye into gas, which then bonds with polyester fabric. The result is a vibrant, long-lasting design.
Best for: Polyester shirts, all-over prints
Pros: Extremely durable and vivid colors
Cons: Only works on light-colored synthetic fabrics
At PLC Print, we work with all major printing methods and help clients choose the best one based on their design, budget, and timeline.
Step 4: Prepare the Design for Printing
Once your design is ready, it needs to be prepared for the printing process. This step depends on your chosen method.
- For heat transfer, mirror the design before printing it onto transfer paper.
- For screen printing, separate each color into layers.
- For DTG and sublimation, make sure the design is in high resolution (300 DPI is ideal).
File formats like PNG (with a transparent background), PDF, or vector files (SVG, AI) work best for clean results.
Step 5: Print Your T-Shirt
Now it’s time for the fun part, printing!
If you’re doing it at home, follow these steps:
- Place your t-shirt on a flat surface.
- Line up your design carefully.
- Apply heat (using a press or iron) according to the paper and ink instructions.
- Peel off the backing paper, and let the shirt cool down.
If you want professional-quality results, it’s best to work with a trusted printer. That’s where we come in. At PLC Print, we take care of everything from start to finish, ensuring your shirts come out looking vibrant, aligned, and built to last.
Step 6: Let It Cure and Set
For most printing methods, especially screen and DTG, it’s important to cure the ink. This step helps lock the design into the fabric so it doesn’t fade or crack after washing.
Typically, curing involves:
- Letting the ink air dry for a few hours
- Applying heat with a press to set the ink
- Ensuring the shirt cools before handling
Skipping this step can ruin all your hard work, so don’t rush it!
Step 7: Test and Wash
Before printing in bulk, it’s always a good idea to print a sample shirt first. This lets you test:
- Print quality
- Color accuracy
- Fabric compatibility
- Positioning of the design
Once printed, wash the shirt gently to see how well the print holds up. Use cold water and mild detergent for best results, and avoid harsh scrubbing or tumble drying.
Step 8: Store or Distribute
Once your shirts are ready and approved, you can start packing them for sale, gifting, or events. Store printed shirts in a cool, dry place, away from direct sunlight, to preserve the colors and fabric.
If you’re selling them online, invest in good packaging that protects the shirts during shipping and creates a positive unboxing experience.
Final Thoughts
Learning how to print on a t-shirt can be incredibly satisfying, whether you’re doing it for fun or business. While home methods work great for personal projects, professional printing services offer superior quality, consistency, and durability, especially for larger orders or complex designs.
We at PLC Print love helping creators, brands, and businesses bring their designs to life. Whether you need help choosing the right fabric, printing method, or just want someone to handle the whole process, we’re here to make custom t-shirt printing easy and enjoyable.
Got a design idea in mind? Let’s print something amazing together.
For further queries or information, you can write to us at info@plcprint.com
